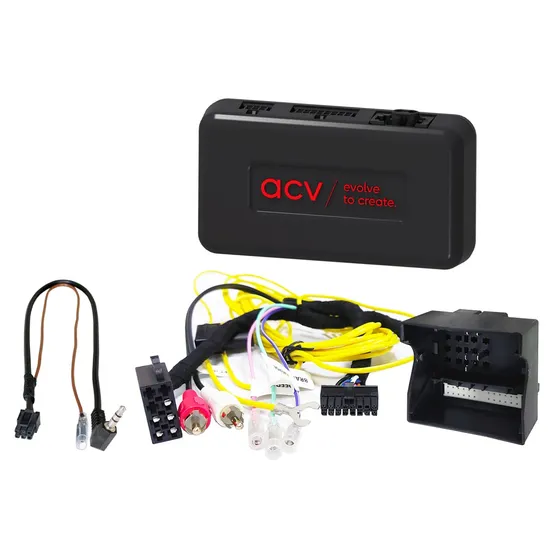
ACV STALK BMW + Optinen
Tuotekoodi: 42XBM012
329,90 €
262,87 € (ALV 0%)
Suositushinta 329,90 €
Note:
CAN Bus
connector: 40 Pin Quadlock BMW
connector: +12V continuous current yellow clamp 30 battery fused
connector: OEM amplified system MOST > RCA(m) red/white
connector: OEM SWC > 3,5mm Jack / loose wire
vehicles with Business Professional OEM HU
vehicles with OEM MOST amplified system
vehicles without iDrive
PDC not supported*
warning chimes not supported*
dip switch settings for the retrofit device manufacturer (look into the manual)
RCA(m) > front preamp output retrofit HU
fader function not supported
Vehicle application:
BMW 1 series (E81/82/87/88) 03/2004 - 10/2013
BMW 3 series (E90/91/92/93) 03/2005 - 10/2013
BMW 5 series (E60/61) 07/2003 - 07/2010
BMW X5 (E70) 03/2007 - 09/2013
BMW X6 (E71/E72) 05/2008 - 06/2014
Following signals are provided:
Reimported vehicles or vehicles with different software may be incompatible in functions.
red: +12V ignition clamp 15
orange: +12V illumination clamp 58
purple/white: +12V reverse gear signal
pink: speed pulse signal
green: GND park brake signal
load capacity outputs: 250 mA max.
current requirement more than 250 mA:
1 relay coil resistance 75 Ohm min.
2 relays coil resistance 150 Ohm min.
SWC
OEM amplified system > fader function not supported
*vehicles with PDC / warning chimes > item: can-pdc
General installation instructions:
Verification:
1: Check all operating functions and vehicle setting functions of the OEM HU.
2: Disconnect the OEM HU voltage-free.
3: Check all interface connections for correctness voltage-free.
Connection and connection sequence:
1: Check settings and hardware configuration of the interface voltage-free.
2: Check configuration of the HU connection cable voltage-free.
3: Connect the HU connection cable according to the operating instructions of the retrofit HU.
4: Connect all other connections according to the operating instructions of the retrofit HU.
5: Connect the entire installation to the vehicle with the main connection last.
6: Software configuration of the interface according to the instructions in the item text and in the manual.
7: Configure the retrofit HU according to the operating instructions of the retrofit device steering wheel remote control/camera/handsfree kit/antenna phantom powering and others.
8: Function test of steering wheel remote control and vehicle
Changes to the configuration of the interface and the HU connection cable:
1: Change configuration voltage-free
2: Reconnection see above 5 to 8
In case of malfunction of the interface or the vehicle:
1: Reinstall the OEM HU
2: Operate the OEM HU
3: Establish CAN bus shut down
4: Check the hardware configuration of the interface
5: Reconnection after CAN Bus shut down see above 5 and 6
More connections, connection changes, alternative connections, connections of loose cables or connection extensions of loose cables specified in the information text or the manual are for orientation purposes only and for the information of trained specialist installer.
More connections, changes to the cable configuration of the wiring harness or use of alternative connections or connection extensions:
1: Connections and changes are to be carried out exclusively by trained specialist installer.
2: Connections and modifications must be checked before connection for any manufacturer approvals or manufacturer warranty conditions that may be affected by the modifications.
3: Connections and modifications must be checked for function and correctness by measuring and comparing them with the vehicle's cable assignment diagram before connection.
4: Connections and modifications are made on the user's own responsibility without guarantee of function.
5: Connections and modifications are made on the user's own responsibility without any guarantee of damage to the vehicle, the retrofit device or the interface.
6: Modifications to the pre-assembled wiring harness may invalidate the product's warranty.